| | DIY Black Tailights |  |
|
|
| Author | Message |
|---|
LayinLo

 Number of posts : 801 Number of posts : 801
Age : 44
Location : Alabama
Drives : TB VIII
Registration date : 2007-07-09
| | Subject: DIY Black Tailights Mon Jul 09, 2007 7:05 pm | |
| OK, this is my first DIY for the EVO///SE community. I'm a big time DIY'er so, if I can, I will. This is a very simple proceedure. I'll include as many photos as I think will help. Be patient and it will turn out fine. As always, if you run into trouble, feel free to pm or email me and I'll do what I can. Materials:Tailights Dremel Tool Krylon Fusion (I chose Satin Black) Blue Painter's Tape 3M Marine Adhesive Sealant 5200 (I chose Black again) Rubbing Alcohol or Dish Detergent A free Day At least a 6 pack (I chose Sam Adams) :beer05:  | |
|
| | |
LayinLo
Number of posts : 801
Age : 44
Location : Alabama
Drives : TB VIII
Registration date : 2007-07-09
| | Subject: Re: DIY Black Tailights Mon Jul 09, 2007 7:06 pm | |
| Steps:Step 1:
Remove your tailights and chill beerThe tailights are held on by 2 screws. Open your trunk and unscrew them. 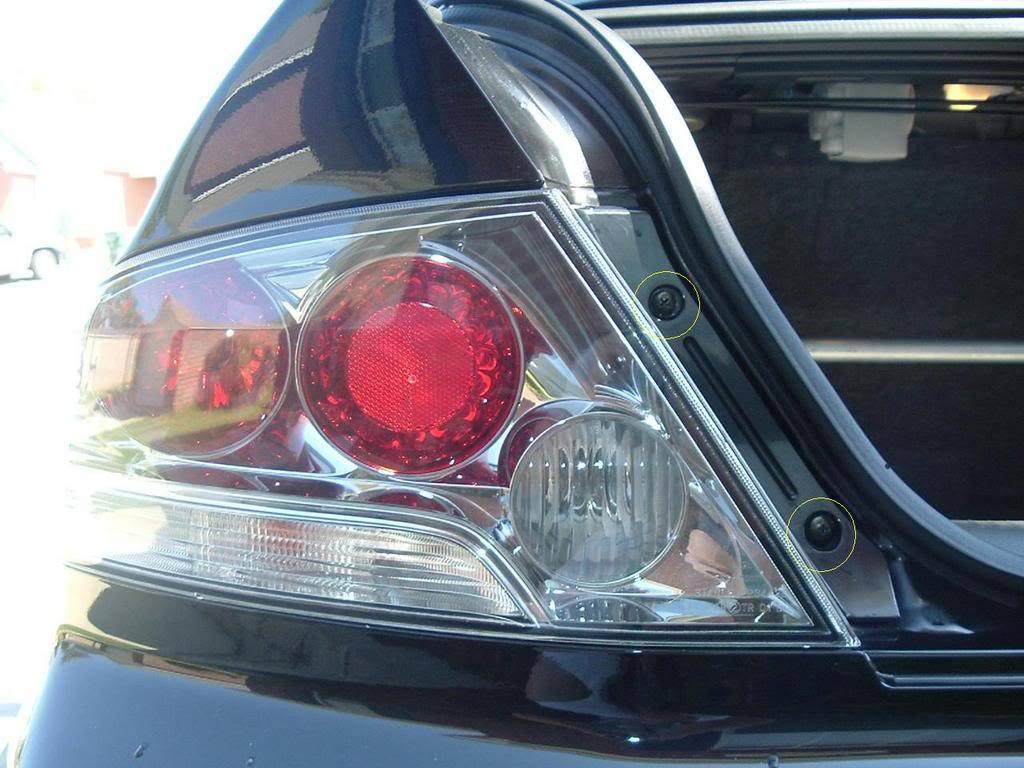 Then pull the tailight in a sideways direction away from the car. It should pull more towards you than to the side of the car. 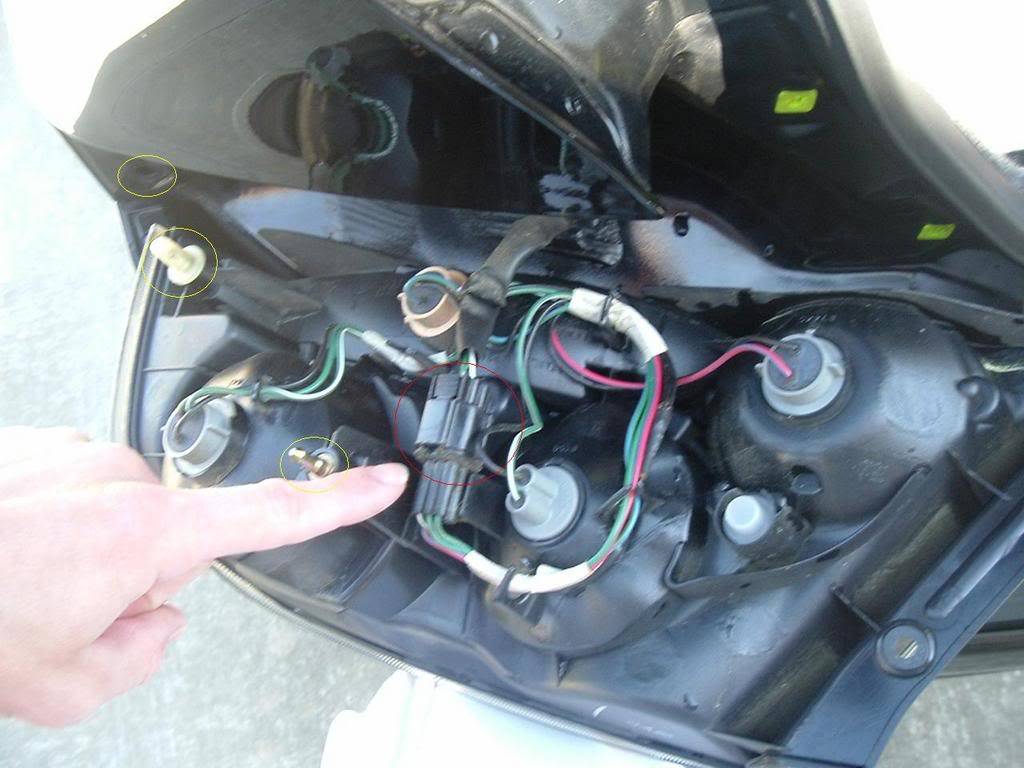 Now unclip the tailight. You can see in the above picture that there are 2 prongs (circled in yellow) this holds the light in along with the screws. The plug is circled in red. Make sure your beer is in the coldest part of the refridgerator. :beer: | |
|
| | |
LayinLo
Number of posts : 801
Age : 44
Location : Alabama
Drives : TB VIII
Registration date : 2007-07-09
| | Subject: Re: DIY Black Tailights Mon Jul 09, 2007 7:06 pm | |
| Step 2:
Separate the tailight housingThis is where it gets fun. You now get to use your trusty Dremel tool and cut the lens from the backing. You will need to cut fairly deep. Just take you time and be patient. 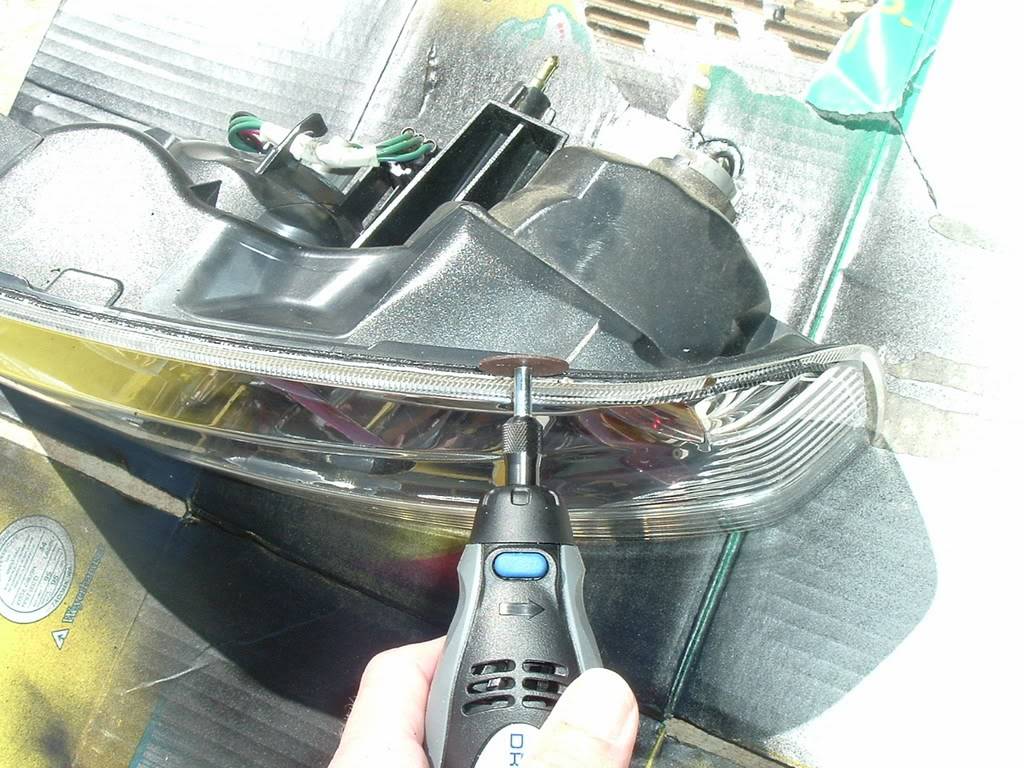 | |
|
| | |
LayinLo
Number of posts : 801
Age : 44
Location : Alabama
Drives : TB VIII
Registration date : 2007-07-09
| | Subject: Re: DIY Black Tailights Mon Jul 09, 2007 7:07 pm | |
| Step 3:
Remove the fugly Altezza ChromeThis piece just pops out. Before you go ripping at it, look around the outside of the piece. There is some strong adhesive that must be removed. I just dremeled it. :lildevil: Mainly because it's easier that way, but you could remove it with a scalpel. I just like cutting stuff with the dremel. Then turn the chrome over and take off the red reflectors. 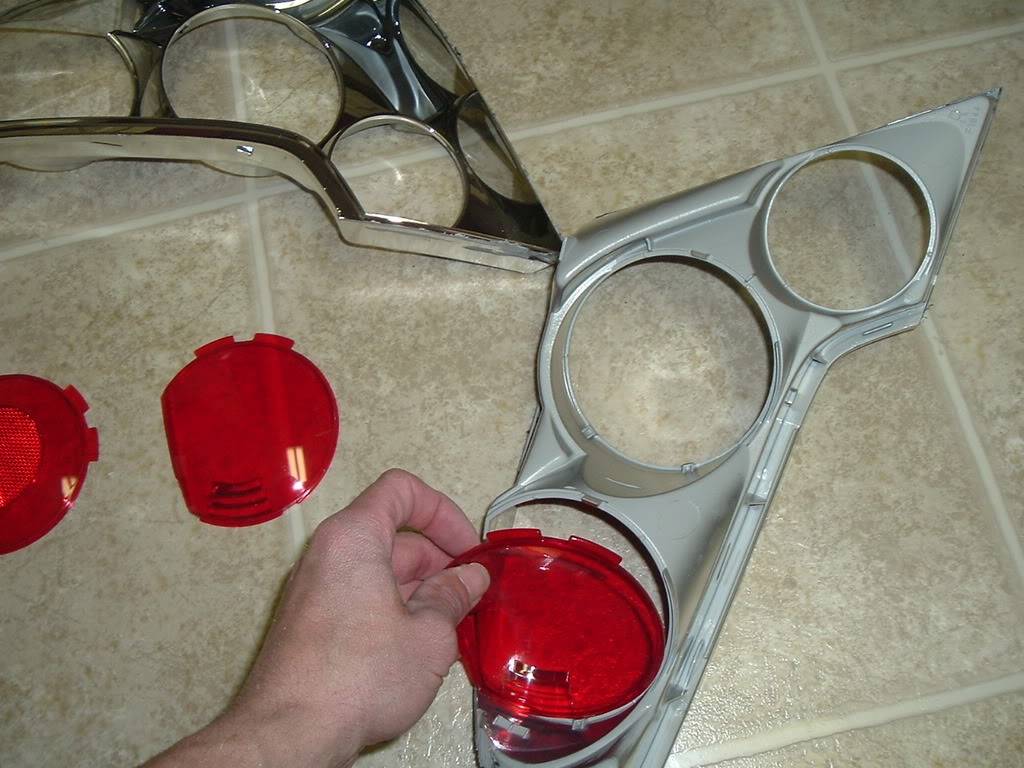 | |
|
| | |
LayinLo
Number of posts : 801
Age : 44
Location : Alabama
Drives : TB VIII
Registration date : 2007-07-09
| | Subject: Re: DIY Black Tailights Mon Jul 09, 2007 7:07 pm | |
| Step 4:
Paint time!!!First prep your pieces to be painted. All you have to do it wipe them down with a cotton swab that has alcohol on it or a little dish detergent on a rag will do the tirck. You are trying to remove any oils that your fingers left after you touched the pieces. If they have oil on them, they will get fisheyes and make the paint not stick. Lay your pieces out on a something that can get overspray on. If you've never spray painted before, don't worry. It's very easy if you take your time! Simply lay a light coat over the chrome piece. 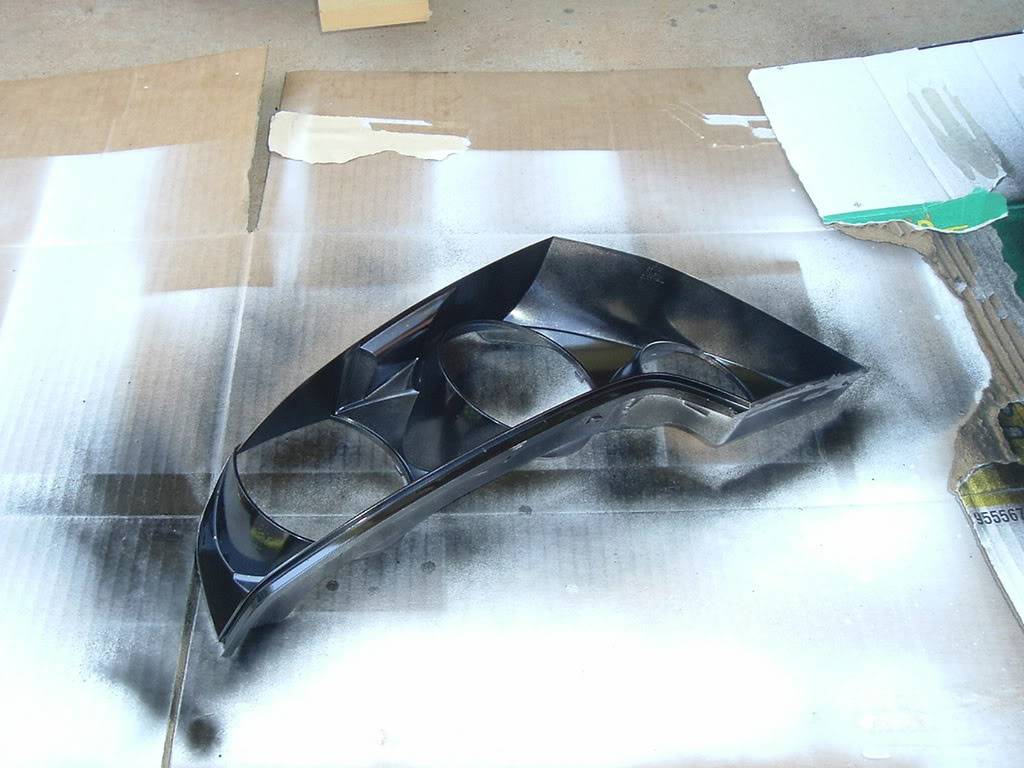 It should take 3-4 coats. All you need is light coats that gently cover the area. If you can prop the pieces up so that you are spraying horizontally, you will have a more even spray pattern. Notice how the first coat did not bury the chrome in paint. I just lightly misted it. You will not need to sand and prime if you follow my directions. I have done this on my other cars, so you get to know my secrets. One of them is the Krylon Fusion. It is specifically made to stick to plastic. This alone will save you 1-2 hours by not having to prime the pieces and then sand and then paint. In between coats, you can go check on the temperature of the beer. :beer: | |
|
| | |
LayinLo
Number of posts : 801
Age : 44
Location : Alabama
Drives : TB VIII
Registration date : 2007-07-09
| | Subject: Re: DIY Black Tailights Mon Jul 09, 2007 7:08 pm | |
| Step 5:
Painting the lens.This is another little secret. You do not have to do this step, but your lights will seem like they are missing something. This little step will make for a more completed look. Take your blue painter's tape and mask of your lens. You can trim it with a razor to about 1/4-1/8" from the edge. Or, if you have a steady hand, just lay your tape about 1/4-1/8" from the edge. 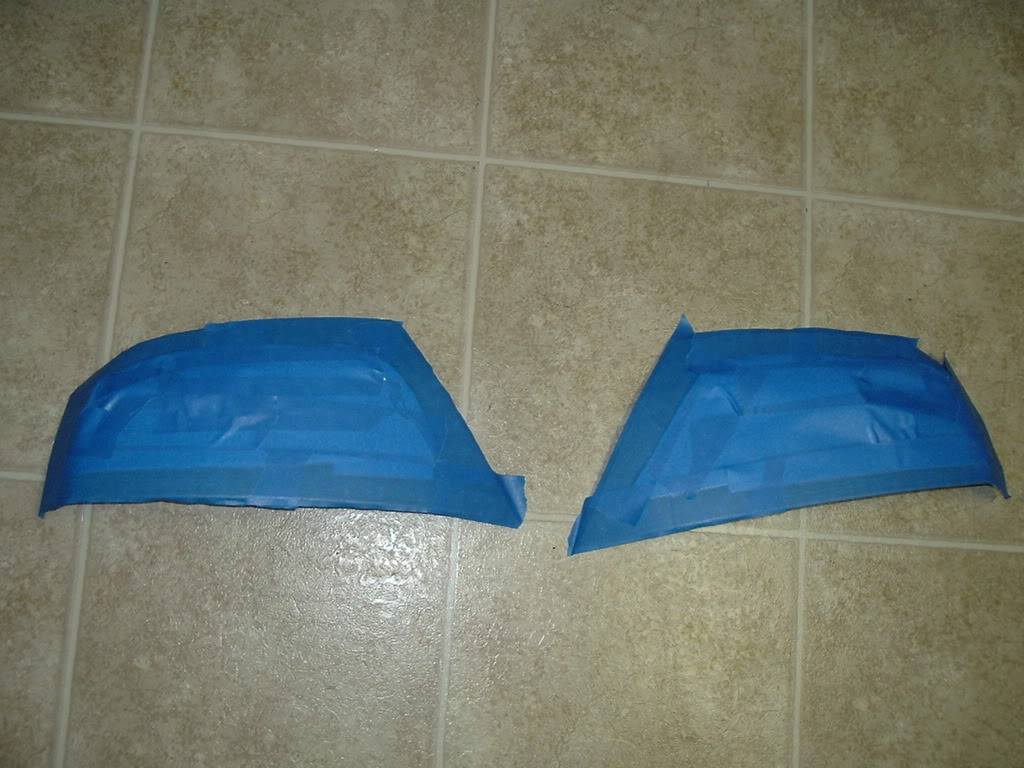 Now, clean the outside edge again with the alcohol or detergent. Then paint the clear lens the same way you painted the chrome pieces. Really lightly. 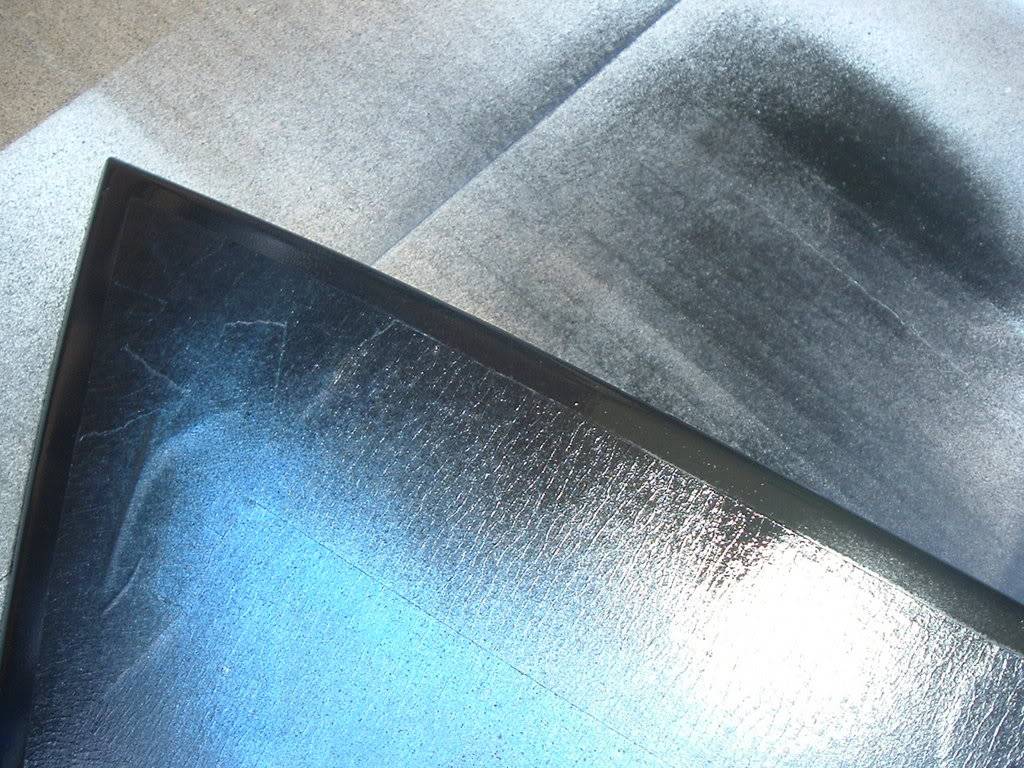 It should start to look like this. Give the pieces about an hour after the last coat for the paint to set and begin to cure. | |
|
| | |
LayinLo
Number of posts : 801
Age : 44
Location : Alabama
Drives : TB VIII
Registration date : 2007-07-09
| | Subject: Re: DIY Black Tailights Mon Jul 09, 2007 7:08 pm | |
| Step 6:
Put it back togetherNow after the paint has dried, you can reassemble the tailights. 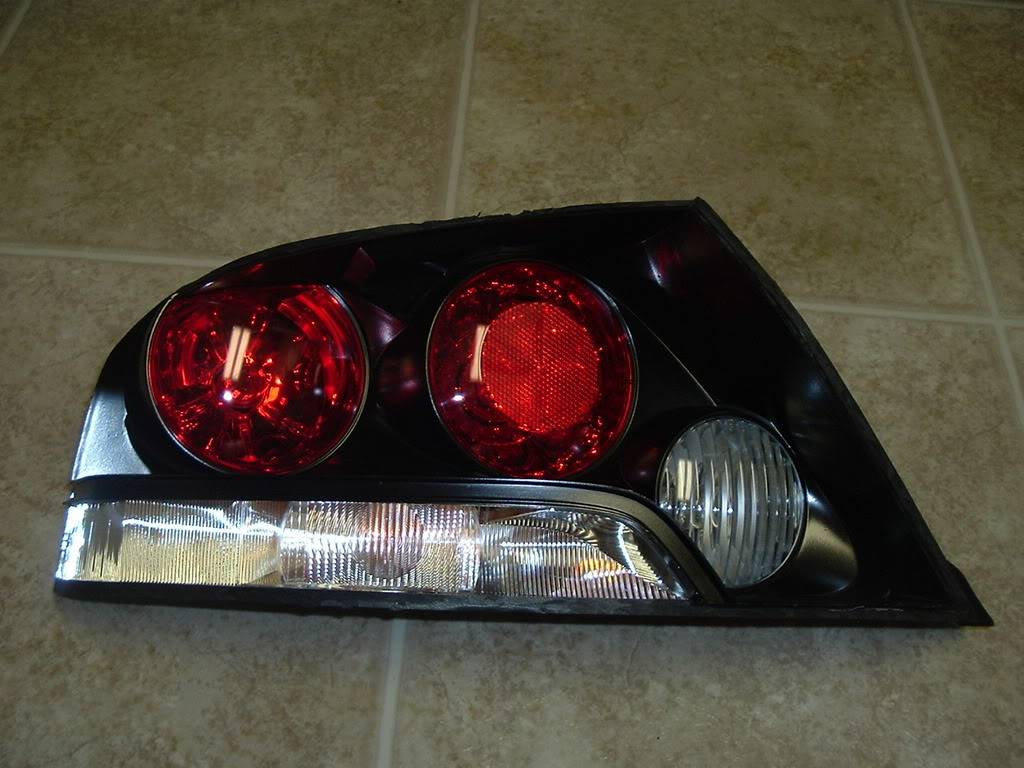 Now take out your 3M Marine Adhesive Sealant 5200, and lay a bead around the outside of the lights. You can do it slowly, this stuff will not begin to cure fast unless it is above 90 degrees F outside. This stuff is just like caulk. Very easy to work with. Apply it to the crack then tool the seam with your finger. Don't worry, the adhesive can be wiped off.  Let the lights sit for about 24 hours. More if you have time. I like to give them 2 days or more. | |
|
| | |
LayinLo
Number of posts : 801
Age : 44
Location : Alabama
Drives : TB VIII
Registration date : 2007-07-09
| | Subject: Re: DIY Black Tailights Mon Jul 09, 2007 7:09 pm | |
| Step 7:
Put the lights on your car
Very self explanatory. Hook the clip back up and then press the lights back into place. Check to make sure they light up. Then screw the 2 screws in on each side.
Now you can step back and crack open that beer. :cheers2: | |
|
| | |
Sponsored content
| | Subject: Re: DIY Black Tailights | |
| |
|
| | |
| | DIY Black Tailights | |
|
